Building apps for macOS offers developers a fantastic opportunity to expand their skills, create useful utilities to solve their problems, and begin their journey as indie developers.
I’ve invited Jordi Bruin to write a guest article on this topic as he launched several useful Mac applications, such as MacWhisper and MacGPT. Here’s his story:

Over the last three years, I’ve released more than 20 Mac apps. I used to primarily focus on building iOS apps and I was always a bit intimidated by macOS development. It always felt like only experienced, senior developers were capable of building stuff for the Mac. AppKit, Storyboards, and (what seemed like) complex windowing problems held me back from trying it out.
This changed when the MacBook Pro with the notch was released in 2021, and I wanted to make a little app called Forehead that would blacken the entire top of the screen to hide the notch. What I discovered was that even back then, SwiftUI was already very approachable on macOS, so there was not a very large learning curve going from iOS to macOS. Obviously, I ran into SwiftUI issues since then as it seems that some of the macOS versions of common SwiftUI components and lists are not as performant or fully featured as on iOS, but often times, there are workarounds available before having to drop down to AppKit.
After launching Forehead, I started building more small, focused Mac apps that adjusted the OS experience to my needs. In this post, I want to highlight three aspects of macOS development that I think make it stand out and fun to experiment with.
Menu bar apps
Something unique to macOS is the menu bar, which makes your app accessible through an icon at the top right of the screen. These apps can be as simple as a list of menu items that users can click to enable features or contain entire SwiftUI views. Many macOS utilities don’t require that much UI; sometimes, a simple menu button is all you need. If you make a menu bar app that does one thing particularly well, it can be very useful for many people, and it doesn’t require a lot of work and code to worry about since there does not have to be a fancy UI.
Apple introduced MenuBarExtra with macOS 13, which made adding a menu bar app to your app a lot simpler. All you have to do to get started is add a MenuBarExtra Scene to your main app file like so:
import SwiftUI

@main
struct SwiftLee_blogApp: App {
    var body: some Scene {
        WindowGroup {
            ContentView()
        }

        MenuBarExtra {
            Text("SwiftLee Bug Fixer")
        } label: {
            Image(systemName: "swift")
        }
        .menuBarExtraStyle(.menu)
    }
}
The above code results in the following application:
Note the .menuBarExtraStyle modifier, which lets you change between a simple list of menubar items or a fully featured SwiftUI view.
When ChatGPT launched in late 2022, I wanted to access it quickly from the menubar. I made a small app called MacGPT, which loaded the ChatGPT website in a small browser within the MenuBarExtra view. Here’s how much code it took to build it:
import WebKit

struct MenuChatApp: App {
    var body: some Scene {
        MenuBarExtra {
            WebViewWrapper(urlString: "https://chat.openai.com")
                .frame (width: 400, height: 700)
        } label: {
            Image (systemName: "brain")
        }
        .menuBarExtraStyle(.window)
    }
}

struct WebViewWrapper: NSViewRepresentable {
    let urlString: String

    func makeNSView(context: Context) -> WKWebView {
        return WKWebView()
    }

    func updateNSView(_ nsView: WKWebView, context: Context) {
        DispatchQueue.main.async (execute: {
            let request = URLRequest(url: URL(string: urlString)!)
            nsView.load(request)
        })
    }
}
While it’s very basic in scope, it was already enough to solve my problem. I released it on Gumroad (more on that later) for free and was surprised to see 15,000 downloads in the first month.
While there are some limitations to using MenuBarExtra (such as not being able to trigger it with keyboard shortcuts and having less control over when the view is visible), it’s a really great tool for exposing macOS’ built-in APIs in a simple interface for the user.
Using Private APIs to develop unique macOS apps and utilities
This brings me to… private APIs. These APIs are used within Apple’s frameworks but are not exposed to developers for various reasons. Often, they’re not stable yet, so Apple wants to avoid breaking apps with future OS releases. But sometimes, they expose features that Apple doesn’t want developers to use for other reasons. Apple discourages the use of private APIs (in fact, they will reject your apps if you try to submit them to the App Store)
While on iOS, it can be very tricky to release an app with private APIs since you will probably get rejected by the App Store review team, this is not as big of a problem on macOS. You can distribute your apps outside of the App Store by notarising your app. After notarization, you can share or sell the app file wherever you want. This also allows you to use private APIs within your apps since the App Store review team won’t review you. A simple way to distribute your notarised macOS apps outside the App Store is to use a service such as Gumroad, which lets you sell your app directly to people within minutes.
Private APIs offer significant control over macOS, enabling the development of unique apps and utilities that modify specific system behaviors. A recent example is Menu Bar Spacing by Sindre Sorhus. It uses private APIs to change the space between menu bar items. It’s not a complex app — all it does is call a private API to adjust the padding between items — but it lets users tweak their macOS experience to suit their needs.
Executing Shell Commands from a Mac app
The last exciting angle I want to highlight is running shell commands within your macOS apps. The macOS terminal allows you to use many system-level features through terminal commands. You can call these terminal commands from within your macOS app, which makes it very easy to build a UI wrapper around a complex terminal command that most average users will not know how to use.
To call shell commands from within your app, you can use Process() and Pipe() similar to this:
func callShell(_ command: String) throws -> String {
let task = Process()
let pipe = Pipe()
task.standardOutput = pipe
task.standardError = pipe
task.arguments = ["-c", command]
task.executableURL = URL(fileURLWithPath: "/bin/zsh")
task.standardInput = nil
try task.run()
let data = pipe.fileHandleForReading.readDataToEndOfFile()
let output = String(data: data, encoding: .utf8)!
return output
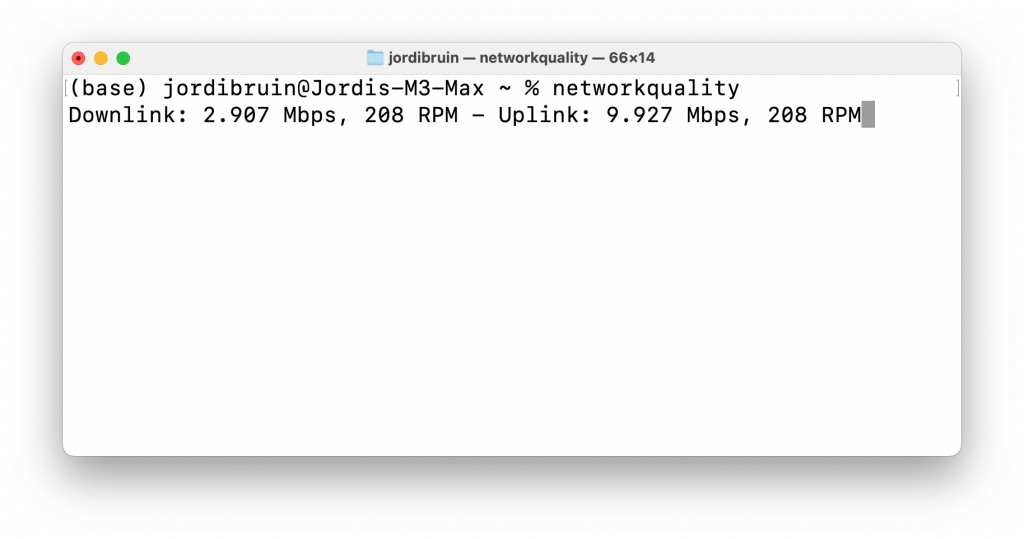
}I first used this in my speed test app Speedy which uses the new networkquality terminal command that Apple introduced in 2022. It tests your network connection by going through Apple servers and is basically a very basic speed test app. By building a wrapper around it, you can create a simple and clean speed test utility without having to worry about servers, infrastructure, or user data privacy.
When running it in the terminal, you get this:
If we wanted to run this within an app, we would call the function above like so:
Button(action: {
Task {
do {
let result = try await self.run("networkquality -c”)
print(result)
} catch {
print(error.localizedDescription)
}
}
}, label: {
Text("Run Network Test")
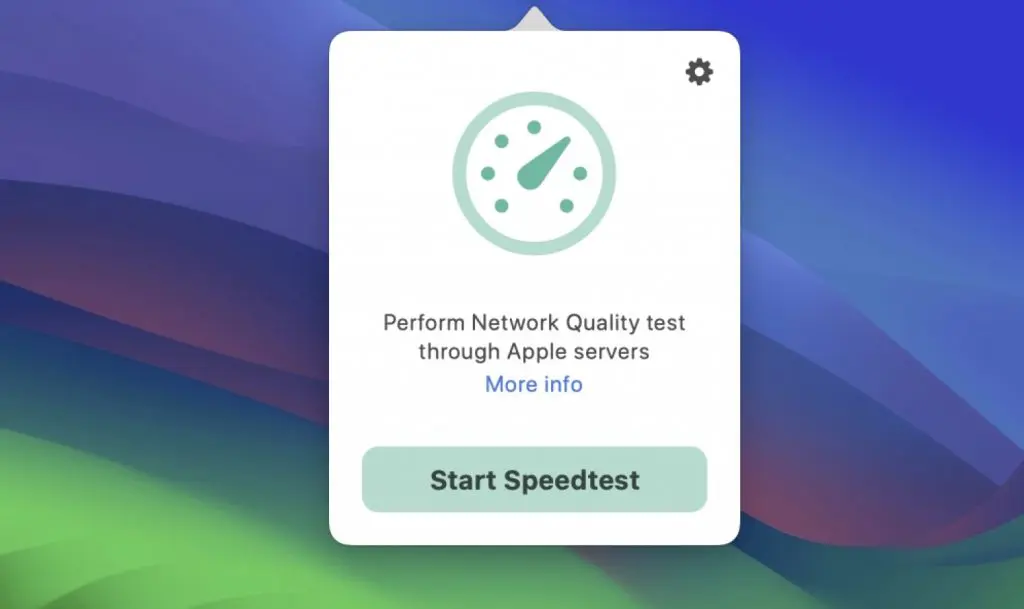
})By using a small SwiftUI window in a MenuBarExtra scene, Speedy easily transforms into a useful utility app without too much setup:
By building on top of these terminal commands, you can expose very powerful functionality in a simple way for your users and make a simple app that provides complex functionality. For example, if you want to run a shortcut from within your app you can just pass shortcuts run ‘My Shortcut Name’.
To inspire you, look at this list of known shell commands and see if you can make something fun with them!
Conclusion
I hope this post makes macOS development a bit more accessible for you. If you encounter an issue or desire a change on the Mac, others will likely feel the same way. So don’t feel like your app is not big, interesting, or good enough. Just try out some stuff, put it out there, keep iterating, and get better along the way.
Get started with a small Menubar app that calls a specific API and returns some information you care about. Play around with some private APIs to see how you can go beyond Apple’s walls.
This article is a guest post from my friend Jordi Bruin. He developed several macOS applications, which you can download from his Gumroad page.