Swift Testing is Apple’s Swift framework for writing tests and introduces several macros, including the #expect macro. Where we had to use all kinds of XCAssert variations before, we can now rely on a powerful replacement that will help us debug tests more quickly.
Before exploring this specific feature of Swift Testing, I encourage you to read my introduction to Swift Testing article. Let’s dive in!
What is the #expect macro?
The #expect macro allows you to write expectations inside tests to validate expected outcomes. It replaces old-fashioned XCTest assertions like XCAssertEqual and XCAssertTrue.
An example looks as follows:
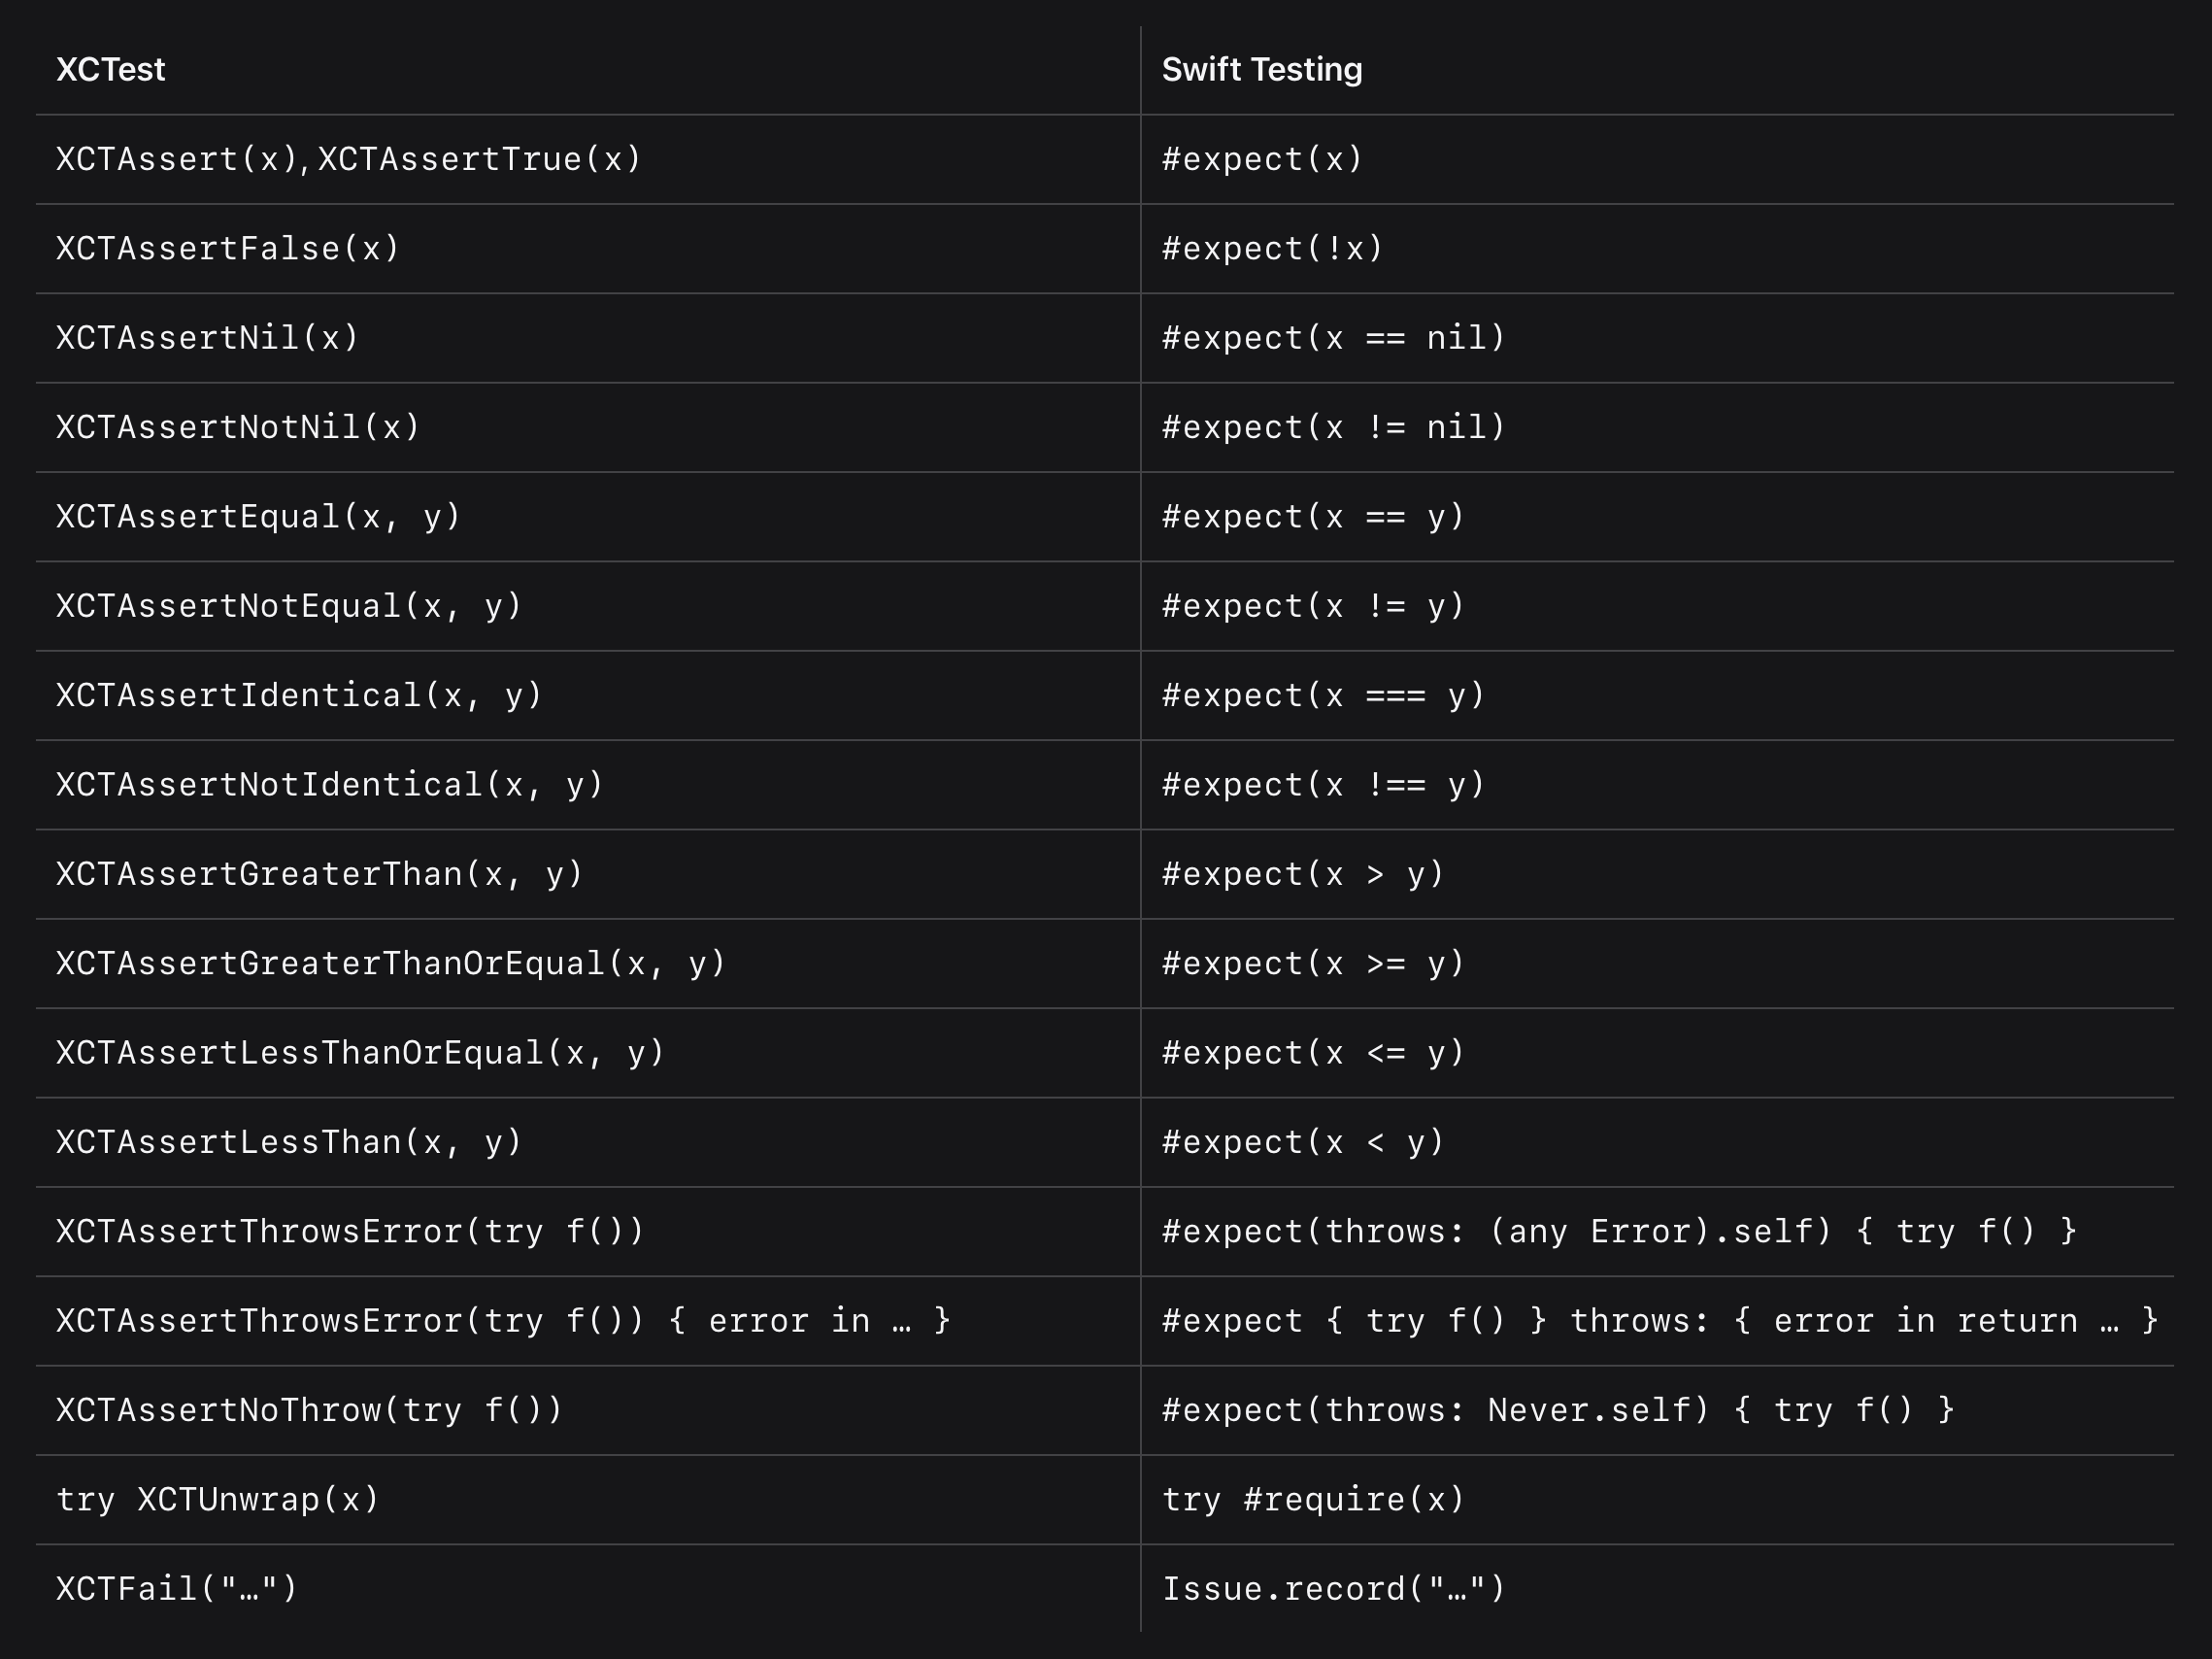
#expect(someBoolean == true)Swift Testing provides a single expectation method that you need to use for all assertions. There’s an alternative #require macro, but this one fails your test early. You can compare the #require macro with running XCTest functions with continueAfterFailure set to false. Altogether, XCTest assertions map to Swift Testing assertions as follows:

As you can see, many of the old assertions are replaced by the new #expect macro. The last two get replaced by #require and Issue.record which will be covered in a future article.
Debugging tests more quickly compared to XCTest assertions
XCTest provided specific global assertion methods for different types of assertions. While it’s recommended to use XCAssertTrue for boolean comparisons, you were never prevented from writing a similar comparison as follows:
XCAssert(someBoolean == true)

// vs.

XCAssertTrue(someBoolean)

// Or even:

XCAssertEqual(someBoolean, true)
Due to this, many developers didn’t benefit from clear assertion failure messages. Therefore, you would potentially see test failure messages that didn’t help you debug the underlying issue:

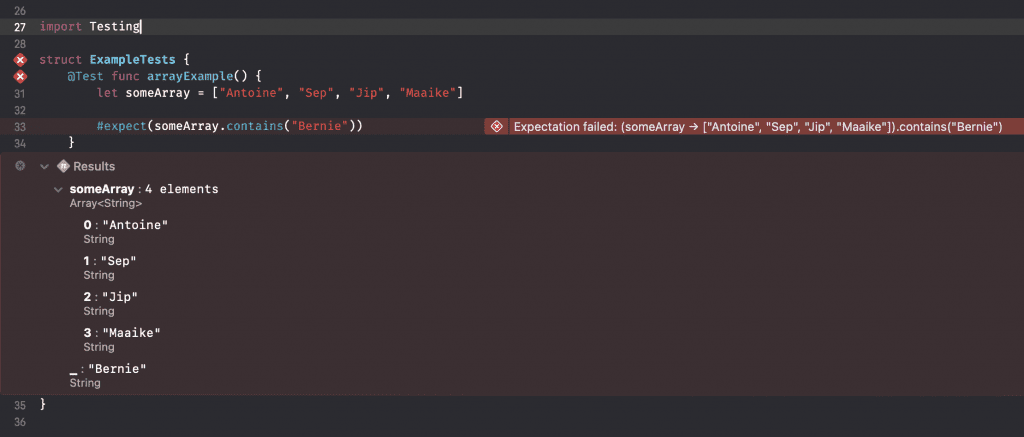
While we know that the assertions failed, none provide insights into what value went in and why the assertion failed. The new #expect macro that was introduced in the Swift Testing framework offers much more detail that potentially allows you to solve the test without further debugging:

As you can see, we can navigate through the contents of the assertion. While the example test clearly shows the input by defining the someArray property inline, you might have tests that use dynamic input where it’s unclear what went in. Having this information within the expectation failure message is a game changer.
A smart way of migrating to this new expectation macro
You’re likely planning a migration of existing projects toward using Swift Testing. While it’s doable to make the migration, it can be a lot of manual work to rewrite expectations and making use of the #expect macro.
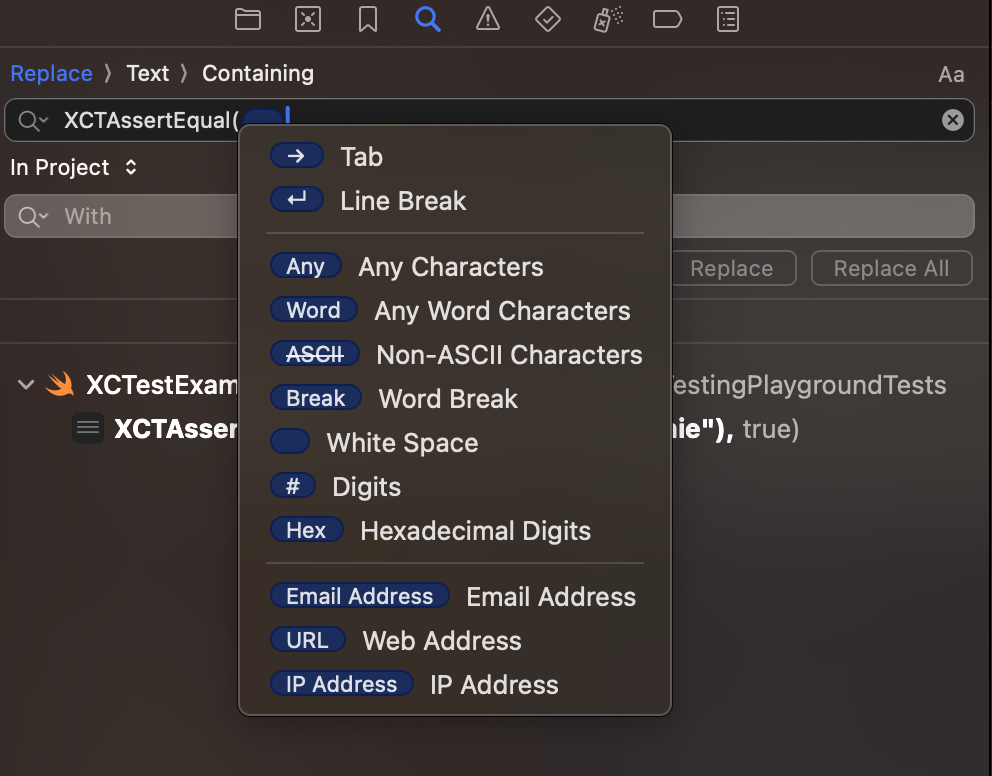
Luckily, we can benefit from a feature in Xcode which allows you to do pattern replacements:
You’re basically searching for any matches that start with XCTAssertEqual followed by Any character and finally resulting in a comma. You can insert patterns by clicking the search scope icon:

Conclusion
Swift Testing is Apple’s Swift framework for writing tests as a replacement of the XCTest framework. It introduces the #expect macro, which replaces old-fashioned assertions like XCTAssertEqual and XCTAssertTrue. You can debug failed tests more quickly and use search patterns for easier migration of existing tests.
Here are a few more articles for you to make the most out of Swift Testing:
- Parameterized tests in Swift: Reducing boilerplate code
- Using the #require macro for Swift Testing
- Vapor and Swift Testing: Running tests in parallel
- Using the #expect macro for Swift Testing
- Using Traits to annotate and customize test behavior
- Swift Testing: Writing a Modern Unit Test
Thanks!