A Network Extension on macOS allows you to create content filters, DNS proxies, and more. They integrate nicely into the system settings and are often used for applications like firewalls and VPN services.
While Apple provides several sample applications like this for filtering network traffic, they don’t have an excellent explanation for testing and debugging extensions when running in Xcode. Until this post appeared on the forums, I had no clue how to test and build a Network Extension—time to sum up my conclusions and write a manual.
What is a Network Extension?
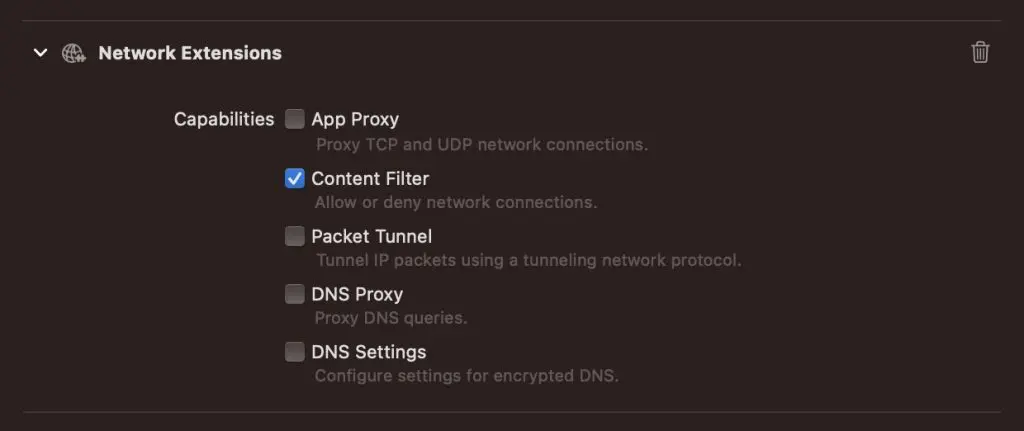
A Network Extension on macOS allows you to customize and extend core networking features. A dedicated capability in Xcode explains the different kinds:

In this case, I’ve been using Apple’s sample code demonstrating how to build a content filter. A Network Extension runs as a separate process and requires you to use an NSXPCConnection to communicate with the main app.
Once you’ve downloaded the sample code, getting any output or debugging using breakpoints is hard. Finding a proper workflow took me some time, but eventually, it worked out nicely.
Debugging Network Extensions on macOS
Debugging an application is essential to verify everything’s working as expected. However, debugging external processes is complicated and requires a different working plan.
Make sure to develop and run from the /Applications directory
System extensions only work if the container app is installed within the /Applications directory. Moving a fresh build into this directory manually is cumbersome, so automating this process is better.
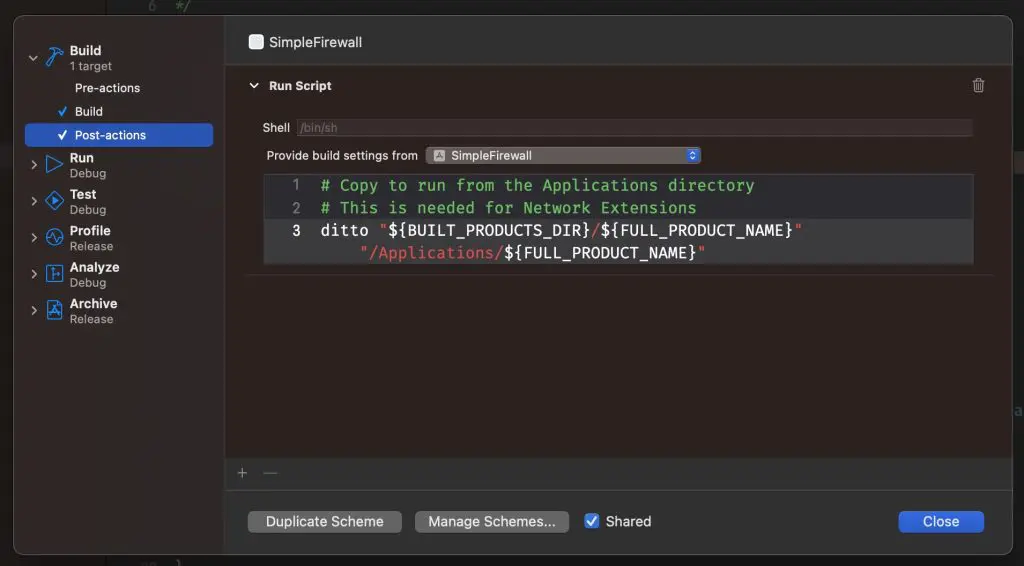
Edit your main app’s scheme and add a new Run Script as a post action using the following code:
# Copy to run from the Applications directory
# This is needed for Network Extensions
ditto "${BUILT_PRODUCTS_DIR}/${FULL_PRODUCT_NAME}" "/Applications/${FULL_PRODUCT_NAME}"
The result looks as follows:

To confirm it works, you can run a new build and verify Xcode moved your app into the Applications directory.
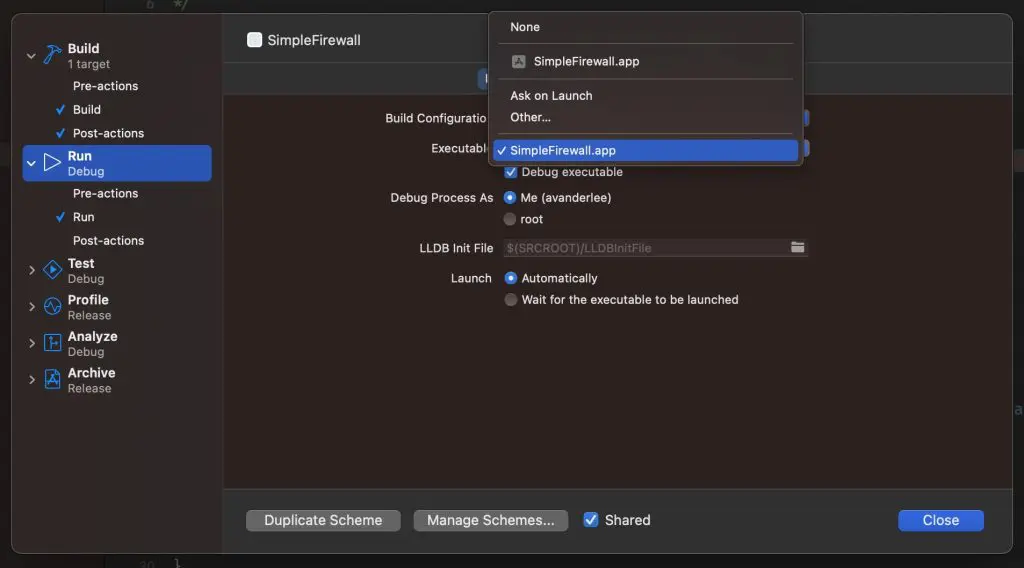
Finally, you need to ensure using the new location as running executable:

While this should be enough to get your fresh build running, I experienced it’s important to reset your environment before each new run.
Resetting in-between builds
Before you re-run your new code changes, I recommend performing the following steps:
- Delete any existing apps containing your extension. Normally, this would only be the app installed inside the
/Applicationsdirectory - Confirm that removing the app will also remove the contained system extension
- Empty your bin
This should uninstall your extension completely.
You shouldn’t use breakpoints
While you could debug an extension using Debug > Attach to Process, it’s not recommended for Network-related extensions. Any incoming or outgoing requests time-out due to using the breakpoint is likely. Instead, validating your code using unit tests or logging is better.
Make use of OS Logs
The beauty of using OS Logs: you can use Console.app to filter and find any behavior of your extension. If you’re new to OS logs, I recommend reading my article OSLog and Unified logging as recommended by Apple.
In the first place, you want to ensure your extension gets started by the system. For this, I recommend updating main.swift as follows:
import Foundation
import NetworkExtension

let log = Logger(subsystem: "com.swiftlee.SimpleFirewallExtension", category: "extension")

func main() -> Never {
    autoreleasepool {
        log.log(level: .debug, "first light")
        NEProvider.startSystemExtensionMode()
        IPCConnection.shared.startListener()
    }
    dispatchMain()
}

main()
I’ve copied the above code from Apple’s sample code, which you can see as the main entry point of your extension. If you don’t see first light being logged inside the Console app after filtering on subsystem com.swiftlee.SimpleFirewallExtension, there’s likely something misconfigured in your project setup.
Once you’ve got your logging working, you can continue your journey into updating the extension as needed.
When you see old logs appearing
I’ve had cases where old logs would appear inside the Console app instead of the logs from my latest build. This is often caused by an old Network Extension still running in the background, taking precedence. You can confirm this by running the following terminal command: systemextensionsctl list:
avanderlee@Antoines-MBP Scripts % systemextensionsctl list

3 extension(s)
--- com.apple.system_extension.network_extension
enabled	active	teamID	bundleID (version)	name	[state]
*	*	4QMDKCA1LJ	com.example.apple-samplecode.SimpleFirewall4QMDKCA1LJ.SimpleFirewallExtension (1.0/1)	SimpleFirewallExtension	[activated enabled]
--- com.apple.system_extension.endpoint_security
In this case, I confirmed only one entry of my extension. If you see duplicates, try to remove them by removing the matching container app or by using the following code from within the matching Xcode project:
let activationRequest = OSSystemExtensionRequest.deactivationRequest(forExtensionWithIdentifier: "com.swiftlee.networkfilter.firewall.extension", queue: .main)
activationRequest.delegate = self
OSSystemExtensionManager.shared.submitRequest(activationRequest)
If none of these options work, you must disable System Integrity Protection as a last resort.
Conclusion
Building Network Extensions can be challenging, so creating an excellent debugging workflow is essential. You should rely on OS logs and clean installs for each performed run. If any old logs appear, you can remove old extensions to ensure your new build gains precedence.
If you like to learn more tips on debugging, check out the debugging category page. Feel free to contact me or tweet to me on Twitter if you have any additional tips or feedback.
Thanks!