Debugging breakpoints in Xcode allows you to replace prints and reuse debugging statements in future debugging sessions. By simply enabling and disabling needed breakpoints you can also get rid of debug levels as often defined in libraries like CocoaLumberjack.
- Reuse breakpoints by enabling them when needed
- Use breakpoints to replace print statements
- Keep your code clean without debugging logs
Inspired by @twostraws’s debugging presentation at @AppdevconNL I now keep around breakpoints instead of print statements for debugging.
✅ Enable / Disable when needed
? Catch bugs faster with reusing debug breakpointsExample: JSON printing in the console ?? pic.twitter.com/JB0lLyyRll
— Antoine v.d. Lee (@twannl) July 12, 2018
Using debugging breakpoints
The most simple implementation of debugging breakpoints is by adding a print breakpoint instead of adding a print statement in our code. Instead of the following code:
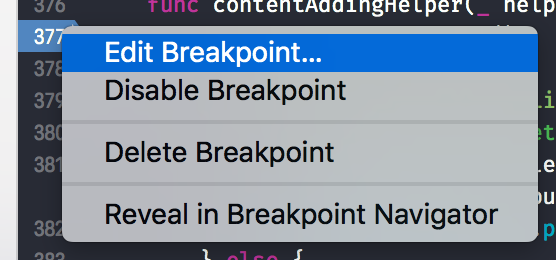
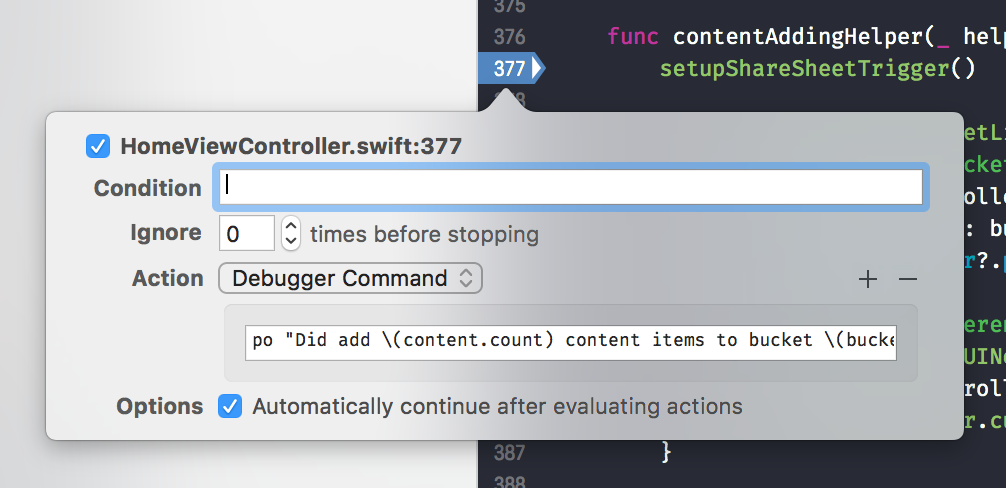
print("Did add \(content.count) content items to bucket \(bucket.name)")We create a breakpoint on the line where we want the print to be triggered. By right-clicking the breakpoint and selecting Edit breakpoint... we enter the breakpoint detail view.

In this view, you are able to define the behaviour of the breakpoint once it’s triggered.

This will log the following line in your console:
"Did add 2 content items to bucket Photos"po stands for print object and can be used to print any reachable objects within the context of the breakpoint line. By ticking Automatically continue after evaluating actions you allow the debugger to continue without pausing once the breakpoint is hit.
More advanced debugging with breakpoints
You can do a lot more with debugging breakpoints. A great start is to check out the talk by Paul Hudson “How to debug like a pro” which is available here.