The Network Link Conditioner allows you to test your apps under slow networking conditions on macOS and iOS. The tool is available for free, provided by Apple, and comes with several default network simulation profiles like 3G, Edge, and 100% loss.
While the tool is built-in on iOS, you’ll need to do some extra work on macOS. It also comes with a downside: it affects the connectivity of your whole device. In other words, if you’re testing on the iOS Simulator with Apple’s Network Link Conditioner, you’ll also experience a slow network for your Mac itself. Luckily, I’ll introduce you to an alternative tool that keeps your Mac’s connectivity blazing fast.
What is a Network Link Conditioner?
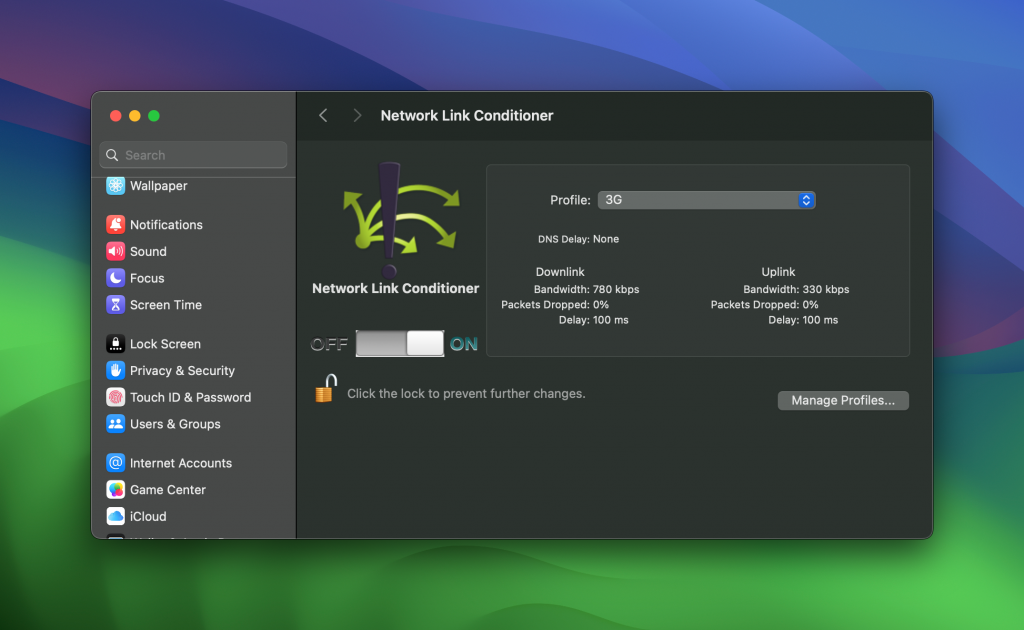
A Network Link Conditioner is a tool that simulates a specific networking condition. For example, the Network Link Conditioner could simulate a 3G networking condition. If turned on, your network connection will be as slow as if the device is connected to a 3G network.
Why should you test your app under slow networking conditions?
While modern countries offer fast and reliable networking conditions, many users likely don’t have a high-speed network connection. Therefore, your app might load specific resources slower, so providing feedback on your user interface is essential.
You’re likely working on a machine with a fast network connection during development. Testing these flows is quite tricky. You can test your apps under these slower conditions using a Network Link Conditioner.
Simulating slow networking conditions on the iOS Simulator
A downside of Apple’s Network Link Conditioner is that it also affects your device’s connection. You’ll find yourself constantly turning the tool on and off while using AI tools or browsing the web for answers on issues. During development, it’s crucial to have a fast networking connection to keep you in your flow. Yet, you still want to test your apps under slow networking conditions.
You can do this by using RocketSim, a developer tool recommended by Apple. It comes with a so-called Network Speed Control, which works similarly to the Network Link Conditioner.
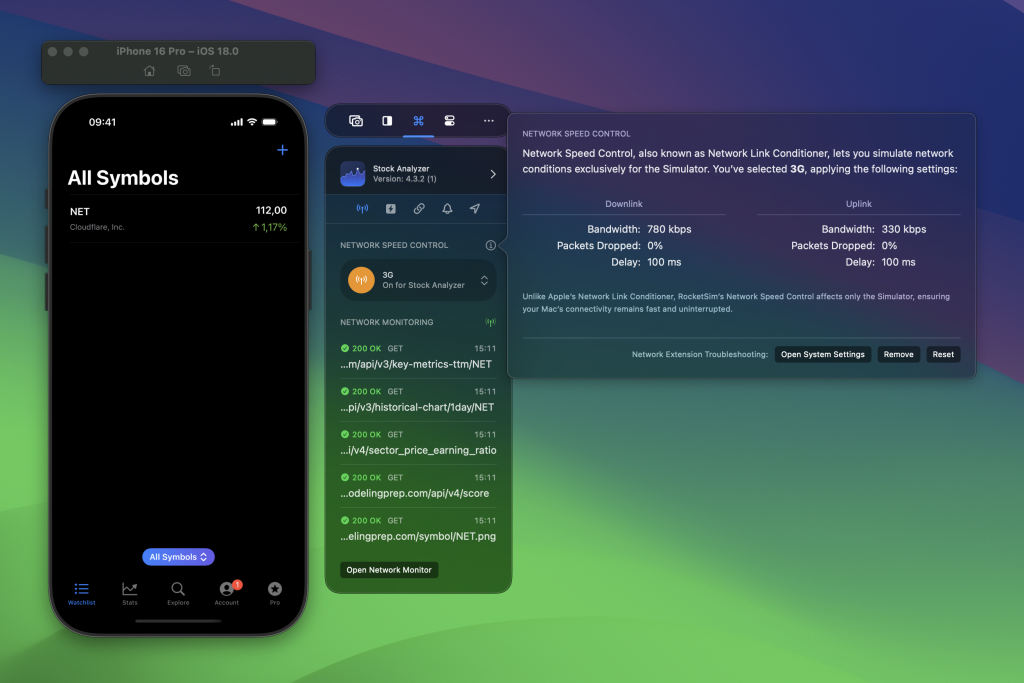
It offers similar profiles like 3G, Edge, and 100% loss, but there’s a key difference: it only affects the networking connection for the Simulator app you’re working on.
You can see this tool in action in this YouTube tutorial:
Using the Network Link Conditioner on iOS
There might be cases where you can only test features on an actual device. In those cases, you can use the Network Link Conditioner on iOS. This feature is part of the developer tools section inside the Settings app of iOS.
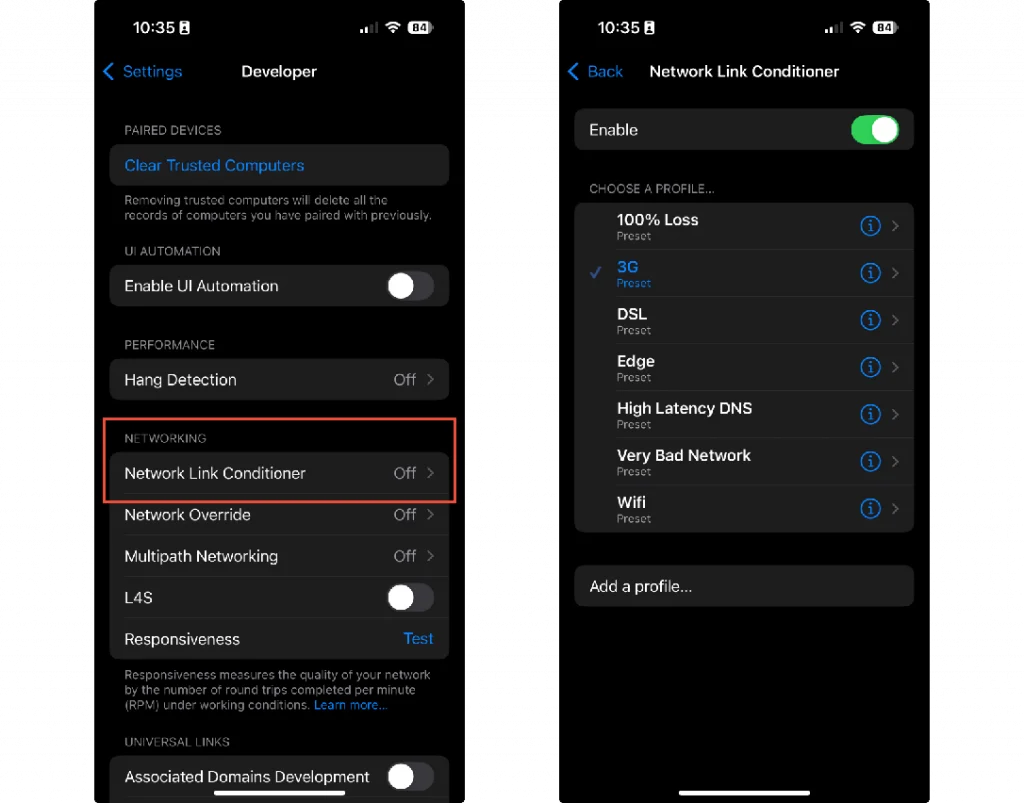
A list of default presets can be found on the tool’s page. You select a preset by tapping one of them. Enable the switch to test your app on the selected preset. A custom preset fitting your needs can be defined by navigating to the Add a profile page.
Using the Network Link Conditioner on MacOS
In case you can’t solve your issue using RocketSim’s Network Speed Control, you can decide to download Apple’s Network Link Conditioner for macOS.
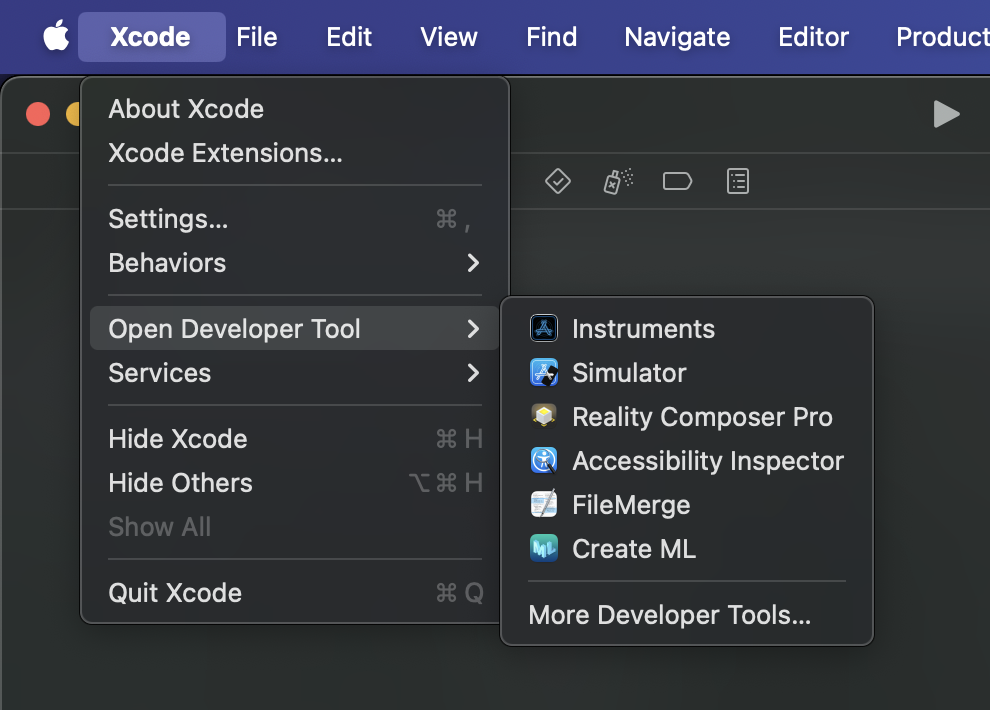
This tool is part of Apple’s additional developer tools, which can be found by navigating to Xcode → Open Developer Tool → More Developer Tools...:
On the page of available downloads, you need to find an item called “Additional Tools for Xcode”:
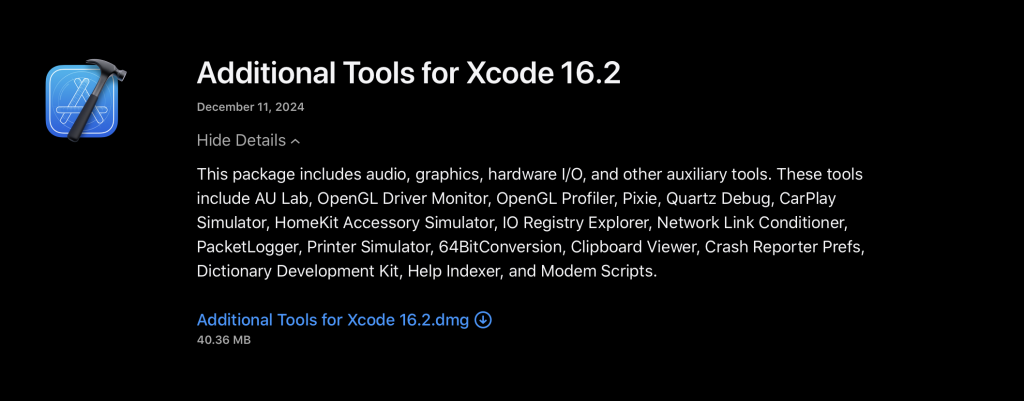
Inside the downloaded .dmg you will find lots of interesting utilities. The Network Link Conditioner can be found inside the Hardware folder. By double-clicking the app you can install the utility in your System Settings.
The application is quite similar to the iOS variant and also contains a list of custom presets. These can be used to simulate a range of Network conditions. Besides of that, you’re able to define your own preset in the Manage Profiles page.

After selecting the preset and enabling the switch, you can start testing under the slow networking conditions on your Mac. Be aware that your whole machine will be affected by this tool, so don’t forget to turn it off.
Conclusion
Testing your apps under slow networking conditions is essential to ensure a proper user experience for all your users. While testing these scenarios is tricky, using tools like RocketSim’s Network Speed Control makes this much more manageable.
If you like to learn more tips on debugging, check out the debugging category page. Feel free to contact me or tweet to me on Twitter if you have any additional tips or feedback.
Thanks!