App Preview Videos allow you to increase the visibility of your app in the App Store. While it’s best to validate whether it leads to higher conversions, it’s certain a moving demo will catch the attention quicker.
Creating a qualitative App Preview Video can be time-consuming, especially since Apple has several specifications to which your video needs to conform. For example, its length has to be between 15 and 30 seconds, and your video needs to have audio, even if it’s muted. Luckily enough, there’s an easier way for you to create a valid preview.
Recording a video using the Xcode Simulator
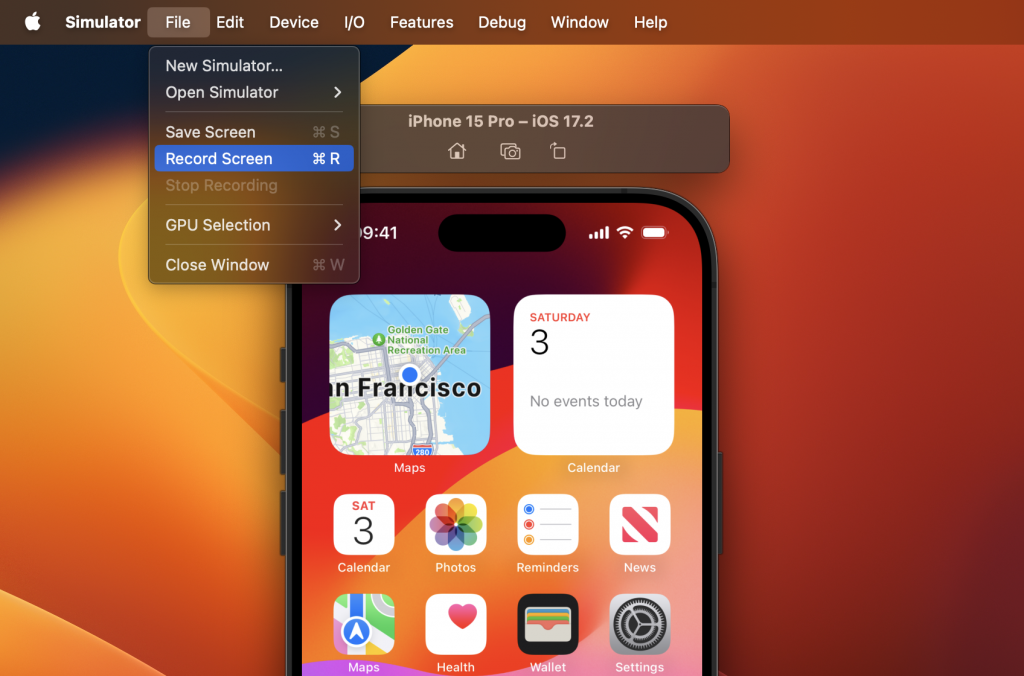
There are multiple ways to create a video in Xcode’s Simulator. The easiest way is to use File → Record Screen (⌘R):

Once you’re done recording, you can press the square button in the header of the Simulator or use File → Stop Recording.
Alternatively, you can make use of the following terminal command:
xcrun simctl io booted recordVideo <filename>.<file extension>For example:
xcrun simctl io booted recordVideo app-preview.mp4After which, you’ll have to press ctrl + c to stop the recording. This command uses Xcode’s command line tool called simctl, which is shorthand for Simulator Control.
While these videos work great for a quick recording, it has a few downsides that make them impossible to use for App Previews:
- The recording does not contain audio.
- App Previews are required to have a frame rate of 30fps, while Simulator recordings have inconsistent frame rates.
- The output video resolution does not match App Preview specifications
Altogether, you must use tools like ffmpeg to convert the video into the right format.
Converting a video to match Apple’s App Preview Specifications
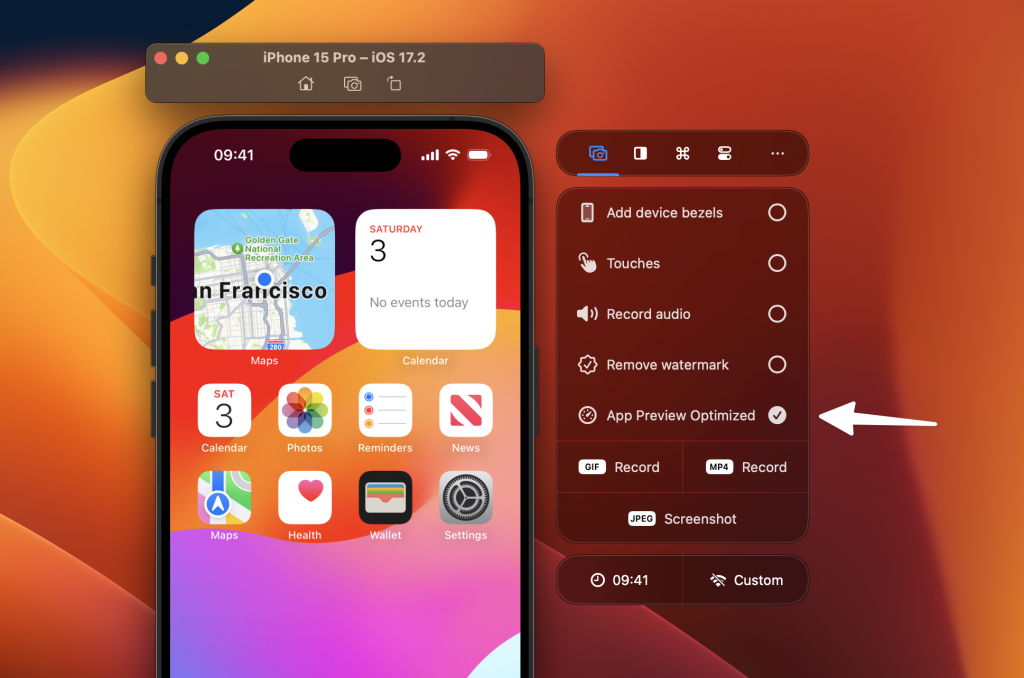
You can create an App Preview video directly in the Simulator and automatically convert it into the proper specifications using a developer tool called RocketSim. The tool shows a side window next to the Simulator with all kinds of enhancements, including a recording window with support for App Preview optimized captures. This solution works for screenshots and App Preview videos, which we’ll need today.

Your recording will start after clicking MP4 Record, and RocketSim will do the rest once the recording finishes. The output video will be in the right dimension, includes audio (either muted or the actual audio if you’ve enabled audio recording), and applies proper frame rate conversion.
The recording results in a floating thumbnail that you can drag directly into App Store Connect. In the following demo, we’re dragging an App Preview optimized screenshot:
Using touches, device bezels, and audio recording modes you can generate a professional App Preview video without having to think about converting it into the proper specifications.
Conclusion
App Preview videos are a great way to showcase your app inside the App Store. It lets you show a moving impression of your app’s features. Creating a video with proper specifications can be time-consuming, but the developer tool RocketSim helps you speed up this process.
If you like to improve your workflow, even more, check out the workflow category page. Feel free to contact me or tweet to me on Twitter if you have any additional tips or feedback.
Thanks!
2 thoughts on “App Preview Videos Capturing using the Xcode simulator”
Comments are closed.