Swift 5.0 has been released in March 2019 and is the first ABI stable Swift release. Although a lot of resources cover the new things in Swift 5.0, they do not often offer you information on what you need to do to update your project to Swift 5.0.
In this post, I’ll go over the steps you can take to update an existing project to Swift 5.0. Check Updating to Swift 4.1 and Updating to Swift 4.2 if your project is not yet migrated to Swift 4.2.
I wouldn’t be surprised if this could be helping to convince your product manager to plan time for the migration.
Automated migration using the migration assistant
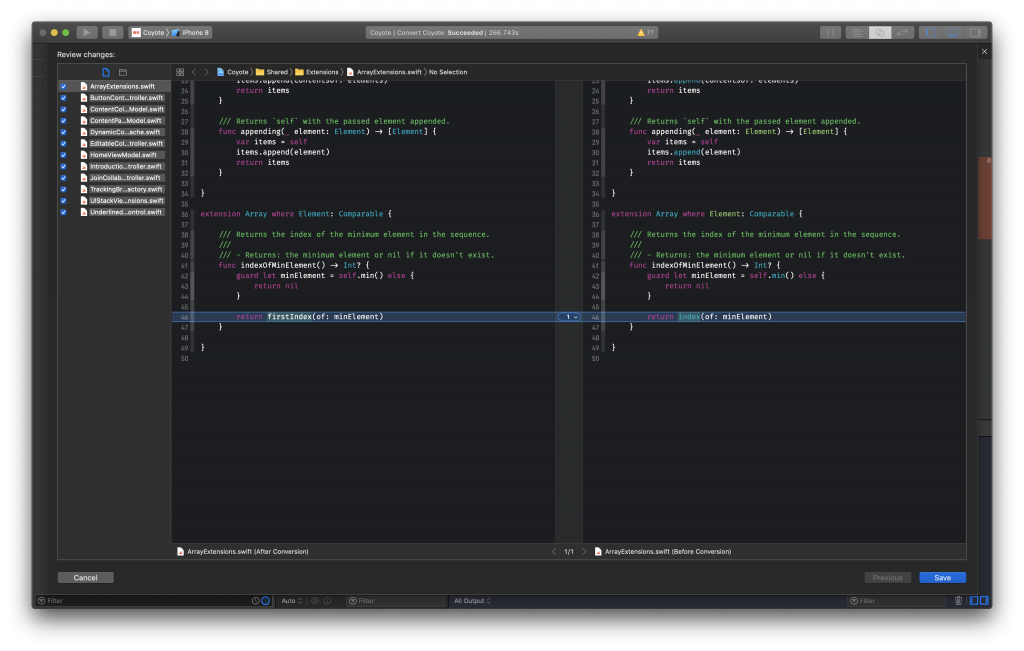
Xcode offers a migration assistant to automatically upgrade your code to the current Swift syntax. This conversion will use the latest Swift version available with the Xcode version you have installed. Xcode 10.2 is the first version to include the Swift 5.0 binary and is therefore needed to do the migration.
Often times, this automated migration will do the heavy lifting for you. Therefore, I recommend starting your migration by going into Edit -> Convert -> To Current Swift Syntax.... Make sure to execute this only for your project and framework. You can skip this for any external dependencies.

Automated migration to Swift 5.0 using the built-in Xcode converter
Updating dependencies
Most likely, you’ve got some Swift dependencies you need to update. A lot of the bigger open source projects like Alamofire and Moya started working on a Swift 5.0 version already. However, it’s likely that not all your dependencies are up to date already. Although I would like to encourage you to do the migration and submit a pull request yourself, you probably have to wait a bit till the project owners did it themselves. At WeTransfer we’re often checking in with our dependencies to see whether an update is available already.
If you’re planning to do a full intensive test of your app after this migration, it might be worth to directly update your dependencies as well. Your test will cover these updates directly as well, which can be a win-win.
Updating the CI environment
If you’re using Travis, Jenkins or any other CI platform you need to upgrade Xcode there as well.
Hello. We've just announced it. https://t.co/t7r4GvZihR
— Travis CI (@travisci) March 29, 2019
Using Result in Swift
The Xcode converter only executes basic code changes. It does not take into account the new Result type which is now included in the Swift standard library. A lot of frameworks have included a Result type in their code. This could mean that you’ve got quite a view enums which are not needed anymore. However, to replace these from your dependencies, you’re dependent on code changes in the external framework.
Therefore, you should focus on the defined Result enums in your own project and frameworks by replacing that with the built-in Swift version. It’s good to point out that the built-in Swift 5 Result type is friends with your existing Result enums and can live together.
Generic Error type
It’s likely that your current Result enum only defined a type for the success case. The Swift 5.0 Result variant also requires you to define an expected error type. Being a good citizen you should try to make this error type specific to what you expect. However, if you want to speed up your migration, you can also just set the type to Swift.Error.
If you would like to read more about the new Result type in Swift 5.0, I would recommend you to read this article by Paul Hudson or go through the slides from Tjeerd in ‘t Veen who did a talk at Appdevcon 2019.
Taking into account ABI stability
ABI stability is a topic on its own. You can read more about it in this blog post on the official Swift blog. It’s good to take into account that the download size of your app will shrink as apps don’t have to embed the Swift standard library anymore. I wouldn’t be surprised if this could be helping to convince your product manager to plan time for the migration.
Further reading
If you would like to dive into Swift 5.0 a bit more, you can go to the Migrating to Swift 5.0 blog post.